Saturday, March 23, 2013

S.W.A.L.K. Stamp Easel Card


Well it has been a while but here I am again.  This is an easel card I have made.  The base is Graphic 45 from the Renaissance Collection, the Tudor Rose Pattern.  The maroon paper I punched with a Martha Stewart punch.  I took some vintage lace from my stash and layered it underneath.

The image itself and the background were cut with my spellbinders dies.  I used flowers from Wild Orchid Crafts in the corners.  The blue dots around the edges are the Studio G glitter glue.

 The envelope is a regular lunch sack.  I cut the bottom of the bag off punched the bottom with the same punch as the borders in the card, adhered it together and placed the same colors onto the top to match with the card.  I stamped the bag with a Penny Black stamp called "Modesty" and then added the Studio G glitter glue to the centers of the flowers.

Thank you for looking,
God Bless,
Toni

Wednesday, January 23, 2013

"Owl Always Love You" Card


I started out with a card board base for my card and dry brushed it around the edges with acrylic white paint.  The pink paper is from my stash.  I distressed around the edges and used that for the background.  Cut a heart from pink paper and added some Studio G silver glitter glue.  Two buttons layered with a piece of twine tied into a bow.   Swirls I cut from a sizzlet die.  Hand rolled roses.  The picture on white cut with a Martha Stewart heart punch.


The inside was simple.   I cut a red strip of the Valentines paper for the background piece and two pieces of cream color punched with the Martha Stewart heart punch.  I added some squiggly doodles around the edges for interest.

Thanks for looking!

Tuesday, January 22, 2013

"Little Girl" Card


The base is from a 6 x12 piece of American Craft Damask paper folded.  The lace frame behind the image is a paper doily.  A piece of a clip art from my computer matted on a chocolate and black background.


The flowers are from my stash. and the swirls are cut from a sizzlet die.


 I used colored penicls to color this image.


The spellbinder frame used for a  matt to write a message on.

Thank you for looking!!!

"All My Love" Valentine Card


The Base of this card is a piece of red  5 3/4 X 11 1/2 American Craft Damask paper folded in half.  I took a piece of manilla paper and frayed the edges with my distresser and then used vintage photo ink to give it an aged look.  The hearts were cut from some pink card stock with my big shot and spellbinder scalloped heart dies.  I also ran them through with my Cuttlebug  dots folder for some texture.  I cut two hearts out of song paper from an old hymnal.  The clip art from my stash.


The butterflies I punched with a Martha Stewart punch.  I placed heart gems from my stash on both butterflies and on three corners of the card.


The flowers are from some swaps and the rosebuds I purchased from Wild Orchid Crafts.  I punched some leaves from a Martha Stewart  punch.    The swirls were cut from a sizzlets die.  I cut a strip of the manilla paper and made a banner with my sentiment on it.  On the sentiment strip and around the clip art I added a bit of silver glitter glue by Studio G.


For the inside of this card I distressed the edges of some pink card stock and also a piece of that manilla paper.   A piece of thread lace trim and more of the heart gems.


Tuesday, July 3, 2012

Congratulations-Anniversary Card


The base of this card is just some craft cardstock that I have in my stash.  I cut it 6x12 to make a 6x6 card.  The blue floral paper behind it is from an old stack that someone gave me and I really liked the older style of it.  The edge was cut with a Martha Stewart punch. 


The flower is one of my handmade flowers made by cutting circles from cardstock and misting it with a spray bottle of water.  I crumpled each piece up and then just barely opened them and used my heat gun to dry the paper.  I then layered them largest to smallest and finally put a little gem in the center.  Also, I tucked a couple sprays of white silk fowers in behind the handmade flower.


I stamped the sentiment with a stamp from Stampin Up in the Close to Cocoa Ink.  Distressed the edge first with Ranger Tim Holtz vintage photo distress ink and then again with the Stampin Up Close to Cocoa ink, 


My image, I believe, was one off a free color page site.  I used my copic markers to color them.   For the bears I used E13,E15 and E18.  For the blues in the clothing BG11 and BG15. YR68 and YR 61 for the dress I believe, and YG03, YG63 and G02 for the grass.  I know!  What a mix but they turned out cute.


I took a piece of white cotton lace and tied it in a bow.  Used a spray of orange silk flowers and some white  flowers I purchased from Wild Orchid Crafts some time ago and applied orange chalk ink to give color to the edges.  And if you look really close just below the center of the bow is a little heart charm.


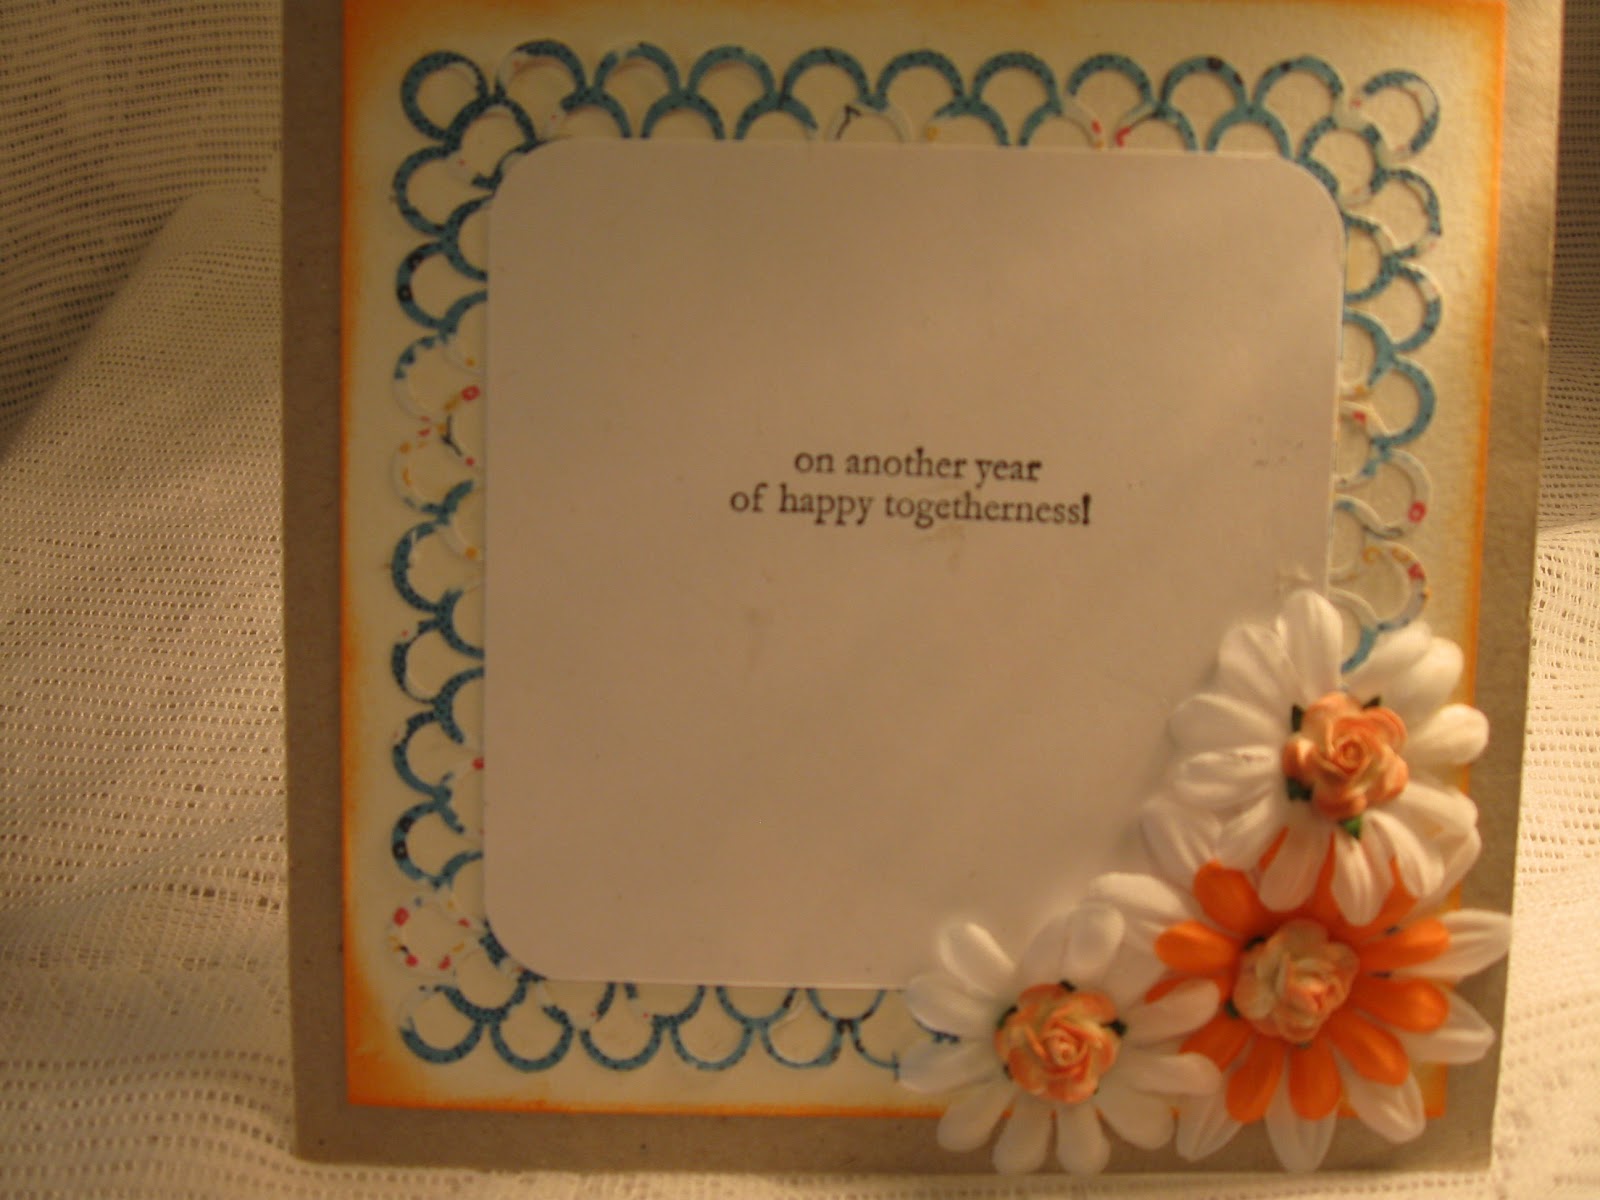
And..... finally the inside of the card.  A layer of white cardstock edged with orange chalk ink.  Another layer of the older floral patterned paper with the Martha Stewart punched edges and then the center white piece with the sentiment from Stampin Up.  I attatched some white daisy silk flowers with some open roses from Wild Orchid Crafts in the centers.

Thanks,
Tmae24crafter

A Vintage Tag


This is a tag I made using the My Minds Eye Lost and Found Collection for the black and white polka dot background. 


The image was clipart that I downloaded to my computer and printed out.  I used my spellbinders scalloped oval for the shape.   Distressed it with the Ranger Tim Holtz vintage photo distress ink around the edges.  I cut another larger scallop oval and ran it through my crimper,  distressed it, and used it for the matt underneath.  Below the matted image is a layer of pretty eyelet lace from my stash.  I used two each of the pastel green and yellow mulberry hip roses from Wild Orchid Crafts and also two of the golden yellow closed 6mm rose buds.  I bunched them up and tied a string bow and added a little rose I made in the center.


For the bottom I took some glittered black cardstock from Best Occasions and made some rolled roses.   The centers are some of the white stamens from Wild Orchid Crafts.  Below is a layer of cotton lace with a piece of black pearl flower trim.


This is my vintage tag I hope are inspired!

Thanks, 
Tmaecrafter

Monday, July 2, 2012

Althered Drink Holder


I first reinforced the bottom to make it sturdier with some strong tape.  I took white paint and painted a base coat.  The paper line I used was from DCWV the CIA BELLA stack.  Each side was measured, cut and then distressed with Rangers Tim Holtz distress ink in vintage photo. 


Around the bottom edge I layered a piece of antique lace and then ran a string of the heart shaped pearl trim over the top of it.  Also, I used my spellbinder and sizzix dies to cut frames and background mats for the adorable little clipart pics I had downloaded to my computer some time ago.  The white bows are from an eyelet lace in my stash with a pink rose also from my stash.


 The side of the drink holder already on the paper from the collection I used had a beautiful picture of flowers on it so I just took a silk flower I had altered and backed with lace and placed it in the lower corner.


This is a closer look.  You can find alot of beautiful silk flowers at your dollar stores.  I usually get them and then take them apart.   I can layer them and use later the way I want to.


 Here I cut a clipart with my circle spellbinder and then used a scalloped spellbinder die to cut a matt for it.  Both were distressed with the vintage photo distress ink.  At the bottom I made a bow from string and put a (2-Tone Antique Blue Open 10mm rose)  from Wild Orchid Crafts in the center.   The other clipart is framed by a Recollections punch that I pasted together and made a frame with.  I distressed it and attatched it to a piece of packaging from a  prima clear stamp set.  I took a wine colored seam binding lace and double tied a bow and attatched two (2-Tone Champaigne Pink Open 10mm roses) and one of the blue listed above from Wild Orchid Crafts.


Here is the other side view which is pretty much the same except for the flower centers. 


                                            This is a closer look. 


                                           Another closer look.


Well this is my project.  I hope you like it and it inspired you to look out of the box.  I think I plan to make more of these and use them as little gift holders. 

Thanks ,
Tmae24crafter